
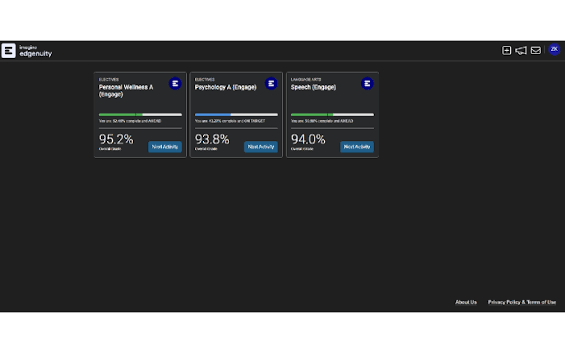
You installed a Chrome extension that’s supposed to make Edgenuity easier, and now… nothing. No icon. No pop-up. Or maybe it showed up fine on every other site except the one course page you actually needed it for. If you’ve been clicking around Chrome’s toolbar wondering why your extension won’t cooperate with Edgenuity, you’re not alone — this is one of the more common headaches students and parents run into with online coursework tools.
This guide walks through the whole process: finding and installing an Edgenuity Chrome extension correctly, setting it up, using it the way it’s meant to be used, and fixing the problems that pop up most often. We’ll also touch on something that gets skipped a lot in these guides — making sure whatever you install is actually appropriate for your course and allowed by your school. Not every extension marketed toward Edgenuity users is built the same way, and not every one is something your teacher would sign off on.
Quick answer: To install a Edgenuity Help Chrome Extension open the Chrome Web Store, search for the extension by its exact name, check the developer and permissions on its listing page, then click “Add to Chrome” and confirm. From there, pin it to your toolbar so it’s easy to find. We’ll go step by step below, plus cover what to do when it doesn’t work.
What Is an Edgenuity Help Chrome Extension?
What a Chrome Extension Actually Does
A Chrome extension is a small piece of software that runs inside your browser and adds or changes some functionality on the pages you visit. It’s not part of Edgenuity itself — Edgenuity is the learning platform your school uses, and the extension is a separate tool built by a third-party developer that interacts with pages you open in Chrome. That distinction matters more than people realize. Because it’s separate software, its quality, safety, and usefulness depend entirely on who built it and how well they maintain it, not on Edgenuity.
What any given extension actually does varies a lot. Some are built around accessibility features, some focus on organizing coursework or tracking progress, and some are just browser utilities that happen to work on Edgenuity pages. There’s no single standard “Edgenuity extension” — so before you install anything, it’s worth being clear on what that specific extension claims to do and whether that lines up with what you actually need.
Check the Extension Before Installing
A little bit of due diligence here saves a lot of trouble later. Look at who published the extension — is it a known developer with other reviewed products, or an anonymous account with one listing? Read the description in full, not just the headline. Check what permissions it’s asking for; if a simple study tool wants access to every website you visit and your browsing history, that’s worth pausing on. Look at when it was last updated and skim a handful of recent reviews, since an extension that hasn’t been touched in two years is more likely to break with the latest Chrome update.
And honestly, the most overlooked step: check with your school or teacher first. Just because something is available on the Chrome Web Store doesn’t mean it’s approved for use with your coursework. Some schools have specific policies about what can run alongside Edgenuity, especially on school-issued devices.
How to Install an Edgenuity Help Chrome Extension
Step 1 — Open Google Chrome
Start with an up-to-date version of Chrome. This sounds like an obvious step, but a lot of “the extension won’t install” or “it installed but does nothing” problems trace back to an outdated browser that isn’t compatible with newer extension code. If you’re signed into a specific Google account or Chrome profile for school, make sure you’re in the right one — extensions installed under one profile won’t automatically show up in another.
Step 2 — Find the Correct Extension
Open the Chrome Web Store and search using the exact extension name, not a rough guess. This part deserves more attention than people give it. There are often several extensions with similar-sounding names, and picking the wrong one can mean installing something that does nothing useful — or worse, something with sketchy permissions. Once you find a listing that looks right, click into it and actually read the details: the developer name, the last update date, and what it says it does.
Step 3 — Add the Extension to Chrome
Once you’re confident it’s the right one, the install process itself is short:
- Open the extension’s Chrome Web Store listing.
- Read through its description and requested permissions one more time.
- Click “Add to Chrome.”
- Chrome will show a permissions prompt — read it before clicking through.
- Confirm the install if everything checks out.
That’s it. Chrome handles the download and setup in a few seconds.
Step 4 — Pin and Access the Extension
Once installed, open the Extensions menu by clicking on the puzzle-piece icon in Chrome’s toolbar. From there you can pin the extension so its icon sits permanently in your toolbar, which makes it much easier to find later. If you don’t see it after installing, don’t panic — it’s very common for newly installed extensions to land in that hidden Extensions menu instead of the visible toolbar. Click the puzzle icon, find it in the list, and pin it manually.
Why can’t I find my Chrome extension after installing it? Almost always it’s because the extension installed successfully but isn’t pinned. Check the Extensions menu (the puzzle icon) before assuming anything went wrong.
How to Use the Extension With Edgenuity
Sign In to Edgenuity First
Open the learning environment your school actually uses and sign into your correct student account. Navigate to the course or lesson you’re working on. This order matters for some extensions — a few only activate once you’re already on a page they recognize, so trying to use them before you’re logged into Edgenuity may not show anything at all.
Open the Extension
Click the extension’s icon in your Chrome toolbar and follow whatever instructions it gives you from there. Keep in mind that some extensions are page-specific, meaning they only “wake up” on certain URLs or after you’ve granted a particular permission. If clicking the icon does nothing while you’re on an Edgenuity page, that’s a troubleshooting sign, not necessarily a broken extension.
Use It Without Creating Academic Problems
This part is worth saying plainly. Stick to extensions built for legitimate purposes — accessibility support, note organization, time management, that kind of thing. The fact that Chrome lets you install something doesn’t mean your school considers it fair game for coursework, so it’s on you to check your school’s academic integrity policy before relying on any third-party tool during assignments or assessments. And as a general rule, don’t type your Edgenuity password or any other sensitive login information into an extension unless you have a clear, specific reason to trust that developer with it.
Edgenuity Help Chrome Extension Not Working? Troubleshooting Guide
Extension Installed but Nothing Happens
Start by checking whether the extension is actually enabled — it’s possible to install something and have Chrome quietly disable it. From there, confirm it’s compatible with your current Chrome version, that it’s designed to run on the specific Edgenuity page you’re viewing, and that it isn’t waiting on a permission you haven’t granted yet. Occasionally the browser itself is blocking the extension, particularly on managed devices.
Extension Icon Is Missing
Open the Extensions menu (that puzzle-piece icon again), check whether it’s listed as installed, and pin it if it isn’t already showing in your toolbar. Also double-check it hasn’t been disabled somewhere along the way.
Extension Does Not Work on an Edgenuity Page
This one has a few usual suspects: the page itself might not be compatible with how the extension was built, a permission might be missing, cached browser data could be interfering, another extension might be conflicting with it, or a school-managed Chrome policy could be restricting it outright. An outdated version of the extension is also a common culprit.
If you’re not sure which of these is the problem, try this sequence: disable the extension, restart Chrome completely, re-enable it, reload the Edgenuity page, and test again. This simple reset resolves a surprising number of “it just stopped working” situations.
When troubleshooting an Edgenuity Help Chrome Extension, it is also worth checking whether the problem is specific to one lesson or affects every Edgenuity page. That small distinction can help you determine whether you’re dealing with a page compatibility issue, a browser setting, an extension permission problem, or a wider restriction on the device.
Chrome Says the Extension Is Blocked
If you’re on a school-managed device, this is often intentional — IT departments can and do restrict which extensions are allowed to run. Don’t try to work around administrator controls; instead, reach out to your school’s IT support or your teacher and ask directly. If you’re on a personal computer and seeing this message, check Chrome’s extension settings and revisit the extension’s current Web Store listing, since it may have been flagged or updated recently.
Edgenuity or Chrome Keeps Freezing
Close tabs you’re not using, restart Chrome, and make sure you’re running the latest version. If freezing continues, try temporarily disabling nonessential extensions one at a time and clearing cached data if that seems appropriate. A good diagnostic step is loading the Edgenuity page with all extensions turned off — if it runs smoothly, you’ve found your culprit.
Chrome Extension Permissions, Privacy & Security
Understand What the Extension Can Access
Permissions aren’t one-size-fits-all. Some extensions only need access to the current page you’re viewing, while others request broader access to your browsing activity, notifications, or data you type into forms. These vary from extension to extension, so it’s worth actually reading the permission list rather than clicking through it on autopilot.
Protect Your Edgenuity Account
Never hand your Edgenuity password to an extension or an unfamiliar site — there’s rarely a good reason for a browser add-on to need that. Steer clear of downloads from sources you don’t recognize, and get in the habit of removing extensions you no longer use, since old, unmaintained software sitting in your browser is a bigger risk than most people realize. Keep Chrome itself updated too, and if you’re on a school-managed device, follow whatever technology policy your institution has laid out.
Are Chrome extensions safe to use with Edgenuity? It depends — on the specific developer, the permissions requested, how actively it’s maintained, and whether your school actually allows it. Being available in the Chrome Web Store isn’t the same as being vetted or approved for classroom use.
When to Remove or Replace an Extension
Sometimes the right move isn’t more troubleshooting — it’s uninstalling. Consider removing an extension if it asks for permissions that don’t match what it’s supposed to do, keeps causing browser issues, behaves in ways that feel off, hasn’t been updated in a long time, conflicts with Edgenuity or other required school software, or is simply something your school doesn’t allow.
Reinstalling isn’t always the fix either. Sometimes the better answer is leaning on Edgenuity’s own built-in tools or whatever alternative your school has actually approved, rather than chasing a third-party extension that keeps causing friction.
Final Thoughts: Use the Right Extension the Right Way
The process really comes down to a handful of steps: verify the extension is legitimate, install it properly, review what it can access, set it up, test that it works, and troubleshoot methodically if it doesn’t. A good extension should support things like accessibility, organization, or genuine productivity — not offer a shortcut around what your course actually requires of you.
If you’re still stuck after working through this guide, it helps to have specifics on hand: the exact error message Chrome is showing, the extension’s name, your current Chrome version, and whether you’re on a school-managed or personal device. With those details, narrowing down the actual cause gets a lot faster.
Frequently Asked Questions About Edgenuity Chrome Extensions
1. How do I install an Edgenuity Help Chrome Extension?
Search for it by exact name in the Chrome Web Store, check the developer and requested permissions on its listing, then click “Add to Chrome” and confirm.
2. Why is my Edgenuity Chrome extension not showing?
Check the Extensions menu to confirm it’s installed and enabled, then pin it to your toolbar. Also verify you’re using the correct Chrome profile.
3. Why does my extension work on some websites but not Edgenuity?
Usually it comes down to how the extension was built, what permissions it has, general page compatibility, or restrictions set by a school-managed browser policy.
4. Can my school block Chrome extensions on Edgenuity?
Yes. Schools using managed Chrome accounts or devices can restrict which extensions run. If you hit a block like this, contact IT support instead of trying to bypass it.
5. How do I fix a Chrome extension that suddenly stopped working?
Check for available updates, restart Chrome, disable and re-enable the extension, review its permissions, and test whether another extension might be conflicting with it.
6. Is it safe to use an Edgenuity Chrome extension?
Evaluate the developer’s reputation, the permissions requested, how recently it’s been maintained, its privacy practices, and whether your school has approved it — safety isn’t guaranteed just because it’s listed in the Chrome Web Store.